When debugging with gdb, one often looks at the assembly code of the binary file. Here, I will show how to do this and change the output as either 'intel' or 'att' format.
I have a simple helloworld program a.out that I'd like to debug. To do this, enter
$ gdb -q a.out
To read the assembly code of the function main, I would type in
(gdb) disass main
However, the default is in the 'att' format, which isn't my taste. To switch to 'intel' format, I'd type in
(gdb) set disassembly-flavor intel
If you'd like to make this change permanent, simply create a file .gdbinit in your home directory with the command that you want gdb to run every time it initialises.
$ echo "set disassembly-flavor intel" > ~/.gdbinit
That's it! Obviously, you may replace 'intel' with 'att' if you want to switch back to 'att' format.
Friday, October 30, 2015
Friday, October 23, 2015
Pointer vs Array - Possible Memory Leak
Usage of pointers is probably the most common source of error and vulnerability in C; this is why subsequent programming languages invented afterwards relinquish the concept of a pointer.
I personally like the concept of pointers because they are very useful and efficient in many ways, such as in a tree data structure. Furthermore, it helps me better understand how the code works at the low level in more details; it is my belief that a good programmer should know both the low level and high level sides of a system.
At the same time, I admit that one needs to be very careful with pointers because improper use of pointers will lead to a disaster. Here, I would like to give an example of such improper use of a pointer that will lead to memory leak.
People often interchangeably use pointers and arrays. Below is example1.c code:
The code compiles with no error or warning:
$ gcc example1.c -o example1 && ./example1
pppp
aaaa
OK. As you may have expected, the string can be either a pointer or an array; there seems nothing wrong with this. So, is it true that you can interchangeably use the pointer or the array to define a string? The answer is NO.
In the above example, str1 is a pointer to "pppp", which is allocated outside the function main stack. In other words, the variable str1 is a local variable in main, but it points to "pppp" that is saved in the memory outside the main's scope. On the other hand, str2 is a local variable array which saves the string value "aaaa".
Let's examine the memory using gdb. Before that, we need to compile the source with -g option in gcc to supply symbols:
$ gcc -g example1.c -o example1
Next, run gdb and examine str1 and str2:
$ gdb -q example1
Let's examine the memory content of &str1
In my case, 0xbffff570 is the memory address of the variable str1, which stores the content 0x08048560; this address is where the string "pppp" is saved.
(gdb) x/s str1
Let's examine &str2 now.
Now in order to examine memory leakage, let's consider example2.c code:
Let's compile and run it. When compiling the code, your compiler should warn you that the function returns the address of the local variable.
$ gcc example2.c -o example2 && ./example2
I personally like the concept of pointers because they are very useful and efficient in many ways, such as in a tree data structure. Furthermore, it helps me better understand how the code works at the low level in more details; it is my belief that a good programmer should know both the low level and high level sides of a system.
At the same time, I admit that one needs to be very careful with pointers because improper use of pointers will lead to a disaster. Here, I would like to give an example of such improper use of a pointer that will lead to memory leak.
People often interchangeably use pointers and arrays. Below is example1.c code:
The code compiles with no error or warning:
$ gcc example1.c -o example1 && ./example1
pppp
aaaa
OK. As you may have expected, the string can be either a pointer or an array; there seems nothing wrong with this. So, is it true that you can interchangeably use the pointer or the array to define a string? The answer is NO.
In the above example, str1 is a pointer to "pppp", which is allocated outside the function main stack. In other words, the variable str1 is a local variable in main, but it points to "pppp" that is saved in the memory outside the main's scope. On the other hand, str2 is a local variable array which saves the string value "aaaa".
Let's examine the memory using gdb. Before that, we need to compile the source with -g option in gcc to supply symbols:
$ gcc -g example1.c -o example1
Next, run gdb and examine str1 and str2:
$ gdb -q example1
Reading symbols from example1...done.
(gdb) b 6
Breakpoint 1 at 0x80484b3: file example1.c, line 6.
(gdb) r
Starting program: /home/linuxnme/Documents/
pppp
aaaa
Let's examine the memory content of &str1
(gdb) x/wx &str1
0xbffff570: 0x08048560
(gdb) x/s str1
0x8048560: "pppp"
Let's examine &str2 now.
(gdb) x/wx &str2
0xbffff577: 0x61616161
(gdb) x/s &str2
0xbffff577: "aaaa"
Can you tell the difference now? Let's quit gdb with
(gdb) q
(gdb) q
Quit anyway? (y or n) y
Now in order to examine memory leakage, let's consider example2.c code:
Let's compile and run it. When compiling the code, your compiler should warn you that the function returns the address of the local variable.
$ gcc example2.c -o example2 && ./example2
?
pppp
As you can see, when a string is defined as an array in a local function, it is saved in the function's stack and therefore it is completely cleared out when the function returns. However, if a string is defined as a pointer, then the string is saved outside the function's scope, and therefore it will remain in the memory. This is the memory leak in the program. Here, it is only a 5-byte memory leak, but it can get worse very quickly if the function is called multiple times during its run. Although I only demonstrated this with a char string, it could be of any data types including structures or classes.
So, the main lesson here is never define anything directly from a pointer, especially in a local function because it will lead to memory leak.
Saturday, October 10, 2015
Color up Mac OS X Terminal
The default Mac OS X terminal ships without any color. That is, when you search for directories and files using ls, the contents are all displayed in dull and monotonous color unlike what you would get in Ubuntu.


In order to obtain the color features on Mac terminal, one needs to edit ~/.bash_profile file, which will be read every time you launch the terminal. One can use vim to open up the file (or create)
$ vim ~/.bash_profile
and edit the file with the following content


If, however, I execute the bash shell with the --login option,
$ bash --login
it will read the files as if I started the new terminal.


Terminal on Mac OS X

Terminal on Ubuntu
In order to obtain the color features on Mac terminal, one needs to edit ~/.bash_profile file, which will be read every time you launch the terminal. One can use vim to open up the file (or create)
$ vim ~/.bash_profile
and edit the file with the following content
export CLICOLOR=1
export LSCOLORS=DxFxCxGxBxegedabagaced

Now, whenever you open up the terminal on Mac, this file will be read and you will see pretty colors with ls command similar to Ubuntu. You can change the color option if you want to more resemble Ubuntu. Oh, by the way, I also added
if [[ $- =~ "i" ]]; then
echo "~/.bash_profile being read"
fi
echo "~/.bash_profile being read"
fi
in order to remind me that this file is being read. This message appears every time I open up the terminal as well. Here, the if statement tells it to print out only when it is in the interactive mode; this is because scp expects to transfer data via stdin and stdout, and I want to make sure that the echo statement does not get in the way. I also have added
if [[ $- =~ "i" ]]; then
if [[ $- =~ "i" ]]; then
echo "/etc/bashrc being read"
fi
fi
in the /etc/bashrc file. Since this file is protected, one needs to edit this with sudo command
$ sudo vim /etc/bashrc
So, now when I open up the terminal and enter ls command, I get to see some colors as desired, along with the messages that remind me of the two files being read.

To tell you more about how bash on Mac reads files as it starts, the order is as follows.
1. read /etc/bashrc
2. If ~/.bash_profile exists, read it and go to #5. If not, go to #3
3. If ~/.bash_login exists, read it and go to #5. If not, go to #4
4. If ~/.profile exists, read it.
5. Done
This pertains to login shell; that is when you open up the terminal. If you were to run bash from the terminal by the command
$ bash
this will only read ~/.bashrc file. I have edit this file to have
if [[ $- =~ "i" ]]; then
if [[ $- =~ "i" ]]; then
echo "~/.bashrc file being read"
fi
fi
so whenever I open up the bash from the terminal, I see this message. However, since the color feature has been already set when I opened up the terminal, I am still able to see the colors!

$ bash --login
it will read the files as if I started the new terminal.

Lastly, when you type
$ exit
to exit, or
$ logout
to logout from the login shell. When you are exiting or logging out the login-shell, the file ~/.bash_logout will be read. I again have edited this file to include
if [[ $- =~ "i" ]]; then
echo "~/.bash_logout being read"
fi
and this is what I get when I exit terminal.

By the way, how Mac OS X's terminal deals with bash is a bit different from how Ubuntu deals with. I will go through how Ubuntu deals with bash in the later post.
Copy Files and Folders between Server and Client using scp
You may want to move files around between the server and client. This can be done easily for Unix systems using scp.
I am currently running Mac, and I'd like to copy the .vimrc file from Ubuntu to Mac so that I can use vim on my Mac as well. To do this, simply open up the terminal in Mac and run
$ cd ~
$ ls -a .vimrc
This command will show you that .vimrc does not exist in the home folder on Mac.

To copy the file, simply enter
$ scp <user_name>@<IP address>:<source_file_path> <destination_path>
In this case, it would be
$ scp linuxnme@192.168.0.21:~/.vimrc .
Enter the Linux login password, and you should see that the file has been successfully copied. Note that you do not have the tab completion feature for the remote computer, so make sure that you know the file path exactly.
NOTE: If you are printing something in bash when it starts up, scp may not work, as it expects to transfer the data via stdin and stdout. That is, do not put any echo statements in ~/.bashrc file or at least make sure that it is printing in the interactive mode only.
To see if it has been copied to my mac, simply re-enter the command
$ ls -a .vimrc

You will see that the file has been successfully copied! Note that this works only when ssh server is running. That is, if we had not installed openssh-server in the previous post, we would have not been able to do this! Let's test what happens then.
On Ubuntu, open up terminal and stop ssh server by entering
$ sudo stop ssh

Now switch to the Mac terminal and repeat the scp command again
$ scp linuxnme@192.168.0.21:~/.vimrc .


I can also copy from Mac to Ubuntu by reversing source and destination. For example, if I were to copy ~/test.c from Mac to Ubuntu, I would simply enter from Mac terminal
$ scp ~/test.c linuxnme@192.168.0.21:.
Note that tilde ~ refers to the home directory, and period . refers to the current directory.
To copy a folder, I can use -r option with scp. So, I have a folder test_folder in the current directory, and in the directory is a file called test. I will copy this entire folder to Ubuntu using scp with the following command
$ scp -r test_folder/ linuxnme@192.168.0.21:~

To check whether it worked, I will remote into Ubuntu using ssh and voila! The test_folder along with its file test has been successfully copied!

I am currently running Mac, and I'd like to copy the .vimrc file from Ubuntu to Mac so that I can use vim on my Mac as well. To do this, simply open up the terminal in Mac and run
$ cd ~
$ ls -a .vimrc
This command will show you that .vimrc does not exist in the home folder on Mac.
To copy the file, simply enter
$ scp <user_name>@<IP address>:<source_file_path> <destination_path>
In this case, it would be
$ scp linuxnme@192.168.0.21:~/.vimrc .
Enter the Linux login password, and you should see that the file has been successfully copied. Note that you do not have the tab completion feature for the remote computer, so make sure that you know the file path exactly.
NOTE: If you are printing something in bash when it starts up, scp may not work, as it expects to transfer the data via stdin and stdout. That is, do not put any echo statements in ~/.bashrc file or at least make sure that it is printing in the interactive mode only.
To see if it has been copied to my mac, simply re-enter the command
$ ls -a .vimrc

You will see that the file has been successfully copied! Note that this works only when ssh server is running. That is, if we had not installed openssh-server in the previous post, we would have not been able to do this! Let's test what happens then.
On Ubuntu, open up terminal and stop ssh server by entering
$ sudo stop ssh

Now switch to the Mac terminal and repeat the scp command again
$ scp linuxnme@192.168.0.21:~/.vimrc .
Well, this does not work as expected. To restart the ssh server on Ubuntu, open up terminal in Ubuntu and enter
$ sudo start ssh
This will start the ssh server.

I can also copy from Mac to Ubuntu by reversing source and destination. For example, if I were to copy ~/test.c from Mac to Ubuntu, I would simply enter from Mac terminal
$ scp ~/test.c linuxnme@192.168.0.21:.
Note that tilde ~ refers to the home directory, and period . refers to the current directory.
To copy a folder, I can use -r option with scp. So, I have a folder test_folder in the current directory, and in the directory is a file called test. I will copy this entire folder to Ubuntu using scp with the following command
$ scp -r test_folder/ linuxnme@192.168.0.21:~

To check whether it worked, I will remote into Ubuntu using ssh and voila! The test_folder along with its file test has been successfully copied!

Enable vim Coloring, Auto Indentation, Line Numbering, Search Highlighting
If you are using vim as your main editor, you may like to enable some syntax coloring and auto indentation when programming. Here is how you can do it.
Install vim on Ubuntu first. Ubuntu only ships with vi, not vim, so install vim
$ sudo apt-get install vim
Next, set the vim preference so that it loads up every time vim is executed
$ vim ~/.vimrc
This will open up the .vimrc file on your home directory that will be executed whenever vim is loaded up.
To edit the file, press i keystroke, which will switch to the insert mode. Write out
syntax on
set nu
filetype plugin indent on
set tabstop=4
set shiftwidth=4
set softtabstop=4
set expandtab
set hlsearch
To save, press ESC keystroke, and enter
:wq
which will write (w) the file and quit (q).
That's it. syntax on turn on syntax coloring, set nu will turn on line numbering, and the last line filetype plugin indent on will turn on automatic indentation, which is quite handy when programming.
Let's write helloworld program in c using vim
Create helloworld.c file in the home directory by running the following commands in terminal
$ cd ~
$ vim helloworld.c
When the vim opens up, press i keystroke again to switch to insert mode
Enter the c code
#include <stdio.h>
int main () {
printf("Hello World!\n");
return 0;
}
Notice the auto indentation feature!
Again, press ESC key, and enter the following to save and quit vim
:wq
Let's compile using gcc and run it
$ gcc helloworld.c
$ ./a.out
Great to see it works well. Note that the default compiled binary from gcc is a.out. In order to execute the file in the current directory, you simply enter.
$ ./<binary_file_name>
** If you are a Mac OS X user ***
To install vim on Mac OS X, you will first install homebrew and run
$ brew install vim
Also, if you are using a non-Apple keyboard, you probably want to change the configuration of the backspace by appending the following line to ~/.vimrc
set backspace=indent,eol,start
Friday, October 9, 2015
Step by Step Guide to Remote into Ubuntu
To be able to remote into Ubuntu, openssh-server must be installed. To do this, simply type in
$ sudo apt-get install openssh-server
from the terminal. This will install the package and start the server.

In order to check the IP address of the server, enter
$ ifconfig
This command will show the IP address under eth0 inet addr. Make a note of this IP address. In my case, it is 192.168.0.21

From the client side, use ssh client or putty to connect to the server.
When using ssh, enter the following command in the client terminal
$ ssh <server_user_name>@<server_IP_address>
Here, replace <server_user_name> with the Ubuntu login user name, and <server_IP_address> with the IP address that you have made a note of. Accept RSA prompt by typing yes, and enter the login password of the server.

If your client runs Windows, you can use PuTTY in place of ssh client. Download and install it from http://www.chiark.greenend.org.uk/~sgtatham/putty/download.html.
Run PuTTY and enter the IP address of the server and click Open. Accept RSA, enter the username and password, and finally you have successfully remoted in!


You should be remotely logged into the server. The command
$ pwd
will display the current directory (in the server), while
$ whoami
will display the current user (in the server).
To exit the remote session, simply enter
$ exit
You should be back to your client.
Now, you can control Ubuntu remotely! Any terminal commands that you execute on the server locally can be done exactly the same remotely. For example, try installing google chromium browser on the server via remote commands. That is, ssh into the server again, and simply enter
$ sudo apt-get install chromium-browser
You can verify that you can do this! Unfortunately, however, you can only run terminal applications remotely. This is one of the most main reasons that we will need to be familiar with terminal editor, such as vim!

Step by Step Guide to Install Software on Ubuntu using apt-get
When you wish to install new software on Ubuntu, you can open up Ubuntu Software Center and choose from. However, this is slow especially if you are running Ubuntu as a virtual machine. Here is an easy way to get software using terminal.
Open up terminal. Enter the following commands
$ sudo apt-get update
$ sudo apt-get install vim
Vim is a text editor that is beloved by many Unix users. The above commands will first update the package list, and install vim. It will ask whether to install the vim package, so confirm it by entering y. In a moment, it will complete the installation.

I sometimes program in c++, and but Ubuntu does not come with g++. I can easily install it via
$ sudo apt-get install g++
I will be ssh'ing into this guest OS, so I might as well install openssh-server
$ sudo apt-get install openssh-server
Note that there is a 'tab' completion feature here too. Press the Tab keystroke after openssh, and it will automatically add in the dash -. If you double press the Tab key again, it will show the complete list of packages with the name openssh-.

I might as well try installing the client
$ sudo apt-get install openssh-client
In fact, this package is already installed, so it will simply upgrade the software.
I might as well upgrade all the packages
$ sudo apt-get upgrade
If you are curious as to what options you have, type in
$ apt-get --help
Open up terminal. Enter the following commands
$ sudo apt-get update
$ sudo apt-get install vim
Vim is a text editor that is beloved by many Unix users. The above commands will first update the package list, and install vim. It will ask whether to install the vim package, so confirm it by entering y. In a moment, it will complete the installation.

I sometimes program in c++, and but Ubuntu does not come with g++. I can easily install it via
$ sudo apt-get install g++
I will be ssh'ing into this guest OS, so I might as well install openssh-server
$ sudo apt-get install openssh-server
Note that there is a 'tab' completion feature here too. Press the Tab keystroke after openssh, and it will automatically add in the dash -. If you double press the Tab key again, it will show the complete list of packages with the name openssh-.
I might as well try installing the client
$ sudo apt-get install openssh-client
In fact, this package is already installed, so it will simply upgrade the software.
I might as well upgrade all the packages
$ sudo apt-get upgrade
If you are curious as to what options you have, type in
$ apt-get --help
Step by Step Guide to Install Guest Additions to Ubuntu on VirtualBox
You have installed Ubuntu virtual machine, but the screen resolution is extremely low to work with. In this post, I will go through how to install VirtualBox's Guest Addition CD to Ubuntu running on VirtualBox. This will enable you to select higher screen resolution on the guest OS.
First, start up your Ubuntu virtual machine. Then, on the VirtualBox file menu, choose
Devices-->Insert Guest Addition CD Image.
Next, log into Ubuntu and start up terminal application by clicking the Unity icon and enter terminal. Click on the Terminal application.

On terminal, change your path to the inserted media. To do so, enter
$ cd /media/<user_name>/VBOXADDITIONS_5.0.6_103037/
where replace <user_name> with the Ubuntu username you have entered while installing Ubuntu. In fact, you can use the terminal's tab completion feature; for example, you can simply enter
$ cd /med <Tab> <Tab> <Tab>
which will automatically complete the path. Here, <Tab> refers to the Tab keystroke.
NOTE: do not enter $ symbol. This symbol indicates the terminal commands.

Look up files in this directory by typing
$ ls

You can see that there is the run script for Linux. Run this script by typing
$ sudo ./VBoxLinuxAdditions.run
Once again, you can utilize the tab completion feature. Here, sudo commands lets you run the script with the root privilege, which is why it will prompt your Linux root password.

Wait patiently while it is installing the Guest Additions. When complete, it will resume to the terminal command prompt.

Eject the Guest Additions CD by entering
$ eject cdrom
For the installation to take effect, reboot your guest OS by entering
$ sudo reboot
or simply click on the right-most icon on the menu dock on the top of the screen and select down Shut Down and choose Restart.
Wait until Ubuntu reboots, and log back in. In order to set the resolution, enter displays after selecting the Unity icon on the dock. Set the display resolution as you desire.

You may have noticed that Ubuntu is running slower; this is because you have increased the display resolution, but your virtual machine's video memory was set too low. In order to increase the video memory, you will first need to shutdown Ubuntu.
$ sudo poweroff
When the virtual machine completely shuts down, go to the setting and choose Display tab and increase video memory as you desire. I recommend that you also go to the System tab and increase the number of processor option in order to boost the speed of the virtual machine. There are other things you can tweak around to increase the speed. Remember, however, that the more hardware resources you allocate to the virtual machine, the less hardware resources will be available for your host system.
First, start up your Ubuntu virtual machine. Then, on the VirtualBox file menu, choose
Devices-->Insert Guest Addition CD Image.
Next, log into Ubuntu and start up terminal application by clicking the Unity icon and enter terminal. Click on the Terminal application.

On terminal, change your path to the inserted media. To do so, enter
$ cd /media/<user_name>/VBOXADDITIONS_5.0.6_103037/
where replace <user_name> with the Ubuntu username you have entered while installing Ubuntu. In fact, you can use the terminal's tab completion feature; for example, you can simply enter
$ cd /med <Tab> <Tab> <Tab>
which will automatically complete the path. Here, <Tab> refers to the Tab keystroke.
NOTE: do not enter $ symbol. This symbol indicates the terminal commands.

Look up files in this directory by typing
$ ls

$ sudo ./VBoxLinuxAdditions.run
Once again, you can utilize the tab completion feature. Here, sudo commands lets you run the script with the root privilege, which is why it will prompt your Linux root password.

Wait patiently while it is installing the Guest Additions. When complete, it will resume to the terminal command prompt.

Eject the Guest Additions CD by entering
$ eject cdrom
For the installation to take effect, reboot your guest OS by entering
$ sudo reboot
or simply click on the right-most icon on the menu dock on the top of the screen and select down Shut Down and choose Restart.
Wait until Ubuntu reboots, and log back in. In order to set the resolution, enter displays after selecting the Unity icon on the dock. Set the display resolution as you desire.

You may have noticed that Ubuntu is running slower; this is because you have increased the display resolution, but your virtual machine's video memory was set too low. In order to increase the video memory, you will first need to shutdown Ubuntu.
$ sudo poweroff
When the virtual machine completely shuts down, go to the setting and choose Display tab and increase video memory as you desire. I recommend that you also go to the System tab and increase the number of processor option in order to boost the speed of the virtual machine. There are other things you can tweak around to increase the speed. Remember, however, that the more hardware resources you allocate to the virtual machine, the less hardware resources will be available for your host system.
Step by Step Guide to Install Ubuntu on VirtualBox
Hello World!
This is my first post. Here, I will go through briefly how to install Ubuntu on VirtualBox. This way, you can try Ubuntu without a hassle. Here, I am hoping that your system has enough free disk space (at least 10GB) and RAM (at least 4GB); the reason is that your Ubuntu will need to share RAM with your host OS.
First, download and install VirtualBox from https://www.virtualbox.org/wiki/Downloads
In this post, I am downloading VirtualBox 5.0.6 for the Mac platform.

Second, download Ubuntu LiveCD from http://www.ubuntu.com/download/desktop
In this post, I am downloading Ubuntu 14.04.3 32bit (i386).

Now, open up VirtualBox and create a new Virtual Machine by clicking New. Follow the screenshots below.


While it shuts down, it will ask you to remove the installation media. Make sure the media icon on the bottom of VirtualBox window is greyed out. If not, deselect the Ubuntu iso file. Then press enter as it asks.

Finally, you will be prompted with the login screen. Enter your password and voila!


This is my first post. Here, I will go through briefly how to install Ubuntu on VirtualBox. This way, you can try Ubuntu without a hassle. Here, I am hoping that your system has enough free disk space (at least 10GB) and RAM (at least 4GB); the reason is that your Ubuntu will need to share RAM with your host OS.
First, download and install VirtualBox from https://www.virtualbox.org/wiki/Downloads
In this post, I am downloading VirtualBox 5.0.6 for the Mac platform.

Second, download Ubuntu LiveCD from http://www.ubuntu.com/download/desktop
In this post, I am downloading Ubuntu 14.04.3 32bit (i386).

Now, open up VirtualBox and create a new Virtual Machine by clicking New. Follow the screenshots below.


Now, click on Setting button and click on the Storage tab. Click Empty button under Controller: IDE. On the right, click on the Disk image button, Choose Virtual Optical Disk File, and choose the Ubuntu iso file just downloaded.

Next, choose the Network tab and change the option NAT to Bridged Adapter.

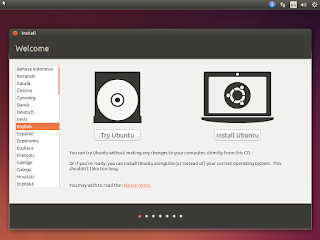
Now, click OK button and we are finally ready to boot up the virtual machine. Click Start button! Please be patient while Ubuntu is booting up. When the following screen appears, click Install Ubuntu.

Keep installing with the default selection until the screen below appears. Do not worry about warning message when formatting the disk; it is a virtual hard disk file that you will be formatting, not the actual hard disk. No harm to your host OS at all. Enter your info and root password. Make sure to write down the name and password you just entered somewhere, so that you do not forget. Continue on.

Again, please be patient while you are installing Ubuntu on your virtual machine. It will take some time to complete. Go take a walk or something. When it's complete, you will be greeted with the restart screen below. Restart it!

While it shuts down, it will ask you to remove the installation media. Make sure the media icon on the bottom of VirtualBox window is greyed out. If not, deselect the Ubuntu iso file. Then press enter as it asks.

Finally, you will be prompted with the login screen. Enter your password and voila!


Subscribe to:
Posts (Atom)